

How to Disable Windows Search on Windows 10/11 Easily in 2022
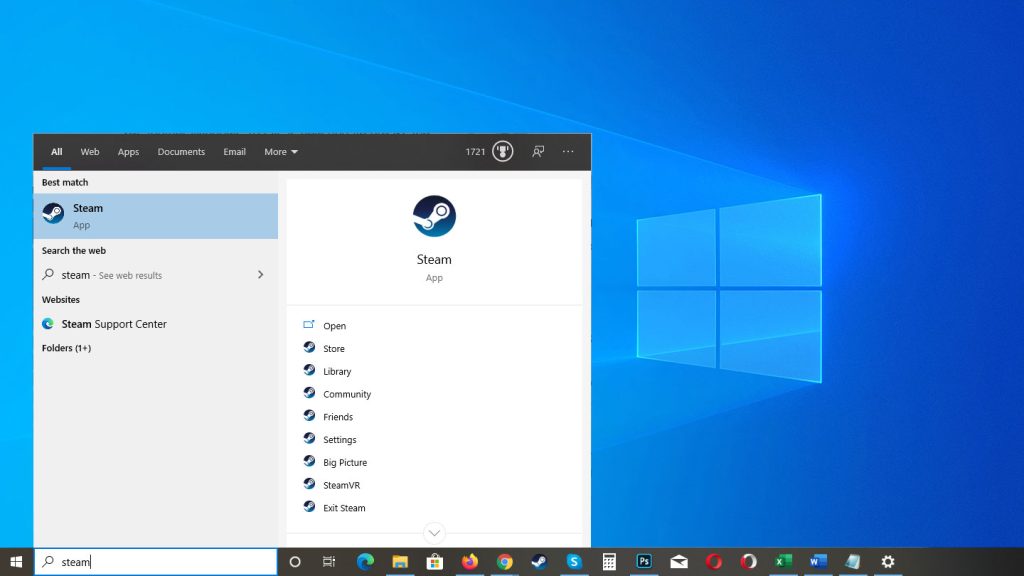
Windows search is a really useful feature of Windows 10. It helps users find their favorite application or settings on Windows PC or laptops. However, many Windows users want to disable this feature of Windows for many reasons. And if you want to do the same, then you just have to come to the right place. Well, there probably isn’t an easy way to disable the Windows search completely, but you can turn off the search index which will do a similar thing. So, just follow the step-by-step guide below to do that easily without any issues.
Below, we have described the complete process of disabling Windows search on your Windows PC. So, if you want to disable Windows search easily, then you just have to follow the guide below. All you need to do is follow the steps described below to disable the search function. Disabling Windows search will help you in many ways. And below, we have described what are the things that you can get when you disable the search function. So, just follow the step-by-step guide, and you can do that easily without any issues. You can also read about stop steam from opening on startup.
Why Disable Windows Search?
Windows search is a really useful feature of Windows. However, for some reason, many Windows users want to disable it. And one of the most common causes of why Windows users want to disable the search feature is because it consumes the RAM and CPU of your Windows PC.
After the Windows 10 update, the Windows search feature isn’t the same as the previous version. Now, you get various features in the Windows search option including web search and search index feature.
These features help users find anything on their Windows PC or laptop. They can find their favorite apps, settings, or any other things via the search feature.
But, the index feature of Windows search consumes a lot of resources on your Windows PC. And if you are using a Windows PC with less RAM and CPU core, then it might affect the performance.
So, the best thing you can do is disable the Windows search feature and get a good speed. However, it’s not guaranteed that disabling Windows search will improve the performance for sure as there are many aspects.
But, if you don’t want to use this feature, then you can disable it easily. Below, we have described different methods to disable the search feature on your PC or laptop. It won’t disable the search completely, but it’ll help to disable the search index to free up RAM and CPU usage.
So, you can just follow the below guide to disable the Windows search on your Windows PC or laptop easily. Just follow the guide, and you can do that without any issues. It’ll help you to disable the search if you don’t feel it is useful.
How to Disable Windows Search on Windows 10/11?
There are different ways to disable the search feature. Below, we have described the popular methods to do that. So, you can just follow your preferred method and disable it easily without any issues.
Method 1: Disable Windows Search Temporarily
With this method, you can disable the Windows search temporarily on your Windows PC. This is the easiest method to disable the search feature on your PC or laptop. You just need to use the command prompt feature to do that. Below, we have described how you can disable it easily without any issues. So, just follow the step-by-step guide, and you can do that easily.
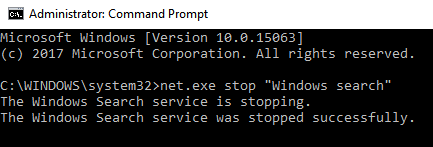
- First of all, open the search option and type ‘CMD’ there.
- It’ll show the command prompt of Windows PC. Now, you have to right-click on the command prompt and select the ‘Run as administrator’ option from there.
- Then, it’ll ask for your permission to open a command prompt as administrator. Just click on ‘Yes’ to confirm it.
- After it opens the command prompt, just copy and paste the below command and hit enter.
That’s it. It’ll show that it has disabled the Windows search feature. This is a temporary solution to disable the search feature of Windows. If you want a permanent solution, you can follow the next method below where we have described the steps to disable the search feature permanently.
Method 2: Disable Windows Search Permanently
If you don’t want to use the search feature and want to disable it permanently, then this step will be good for you. In this step, you can disable the search from the services option of Windows. This will permanently disable the search feature. So, even you turn it off, restart your PC, it’ll disable the search index. So, this method of disabling Windows search is more reliable than the previous method. And below, we have described the step-by-step guide to do that. So, you can just follow the below guide and disable the search feature easily without any issues.
- First of all, open Run from using the search option. Or, you can use the Windows Key+R shortcut to open Run on your Windows PC.
- Then, type services.msc and hit enter to open services of Windows. You can also type services in the search bar, and open the services option.
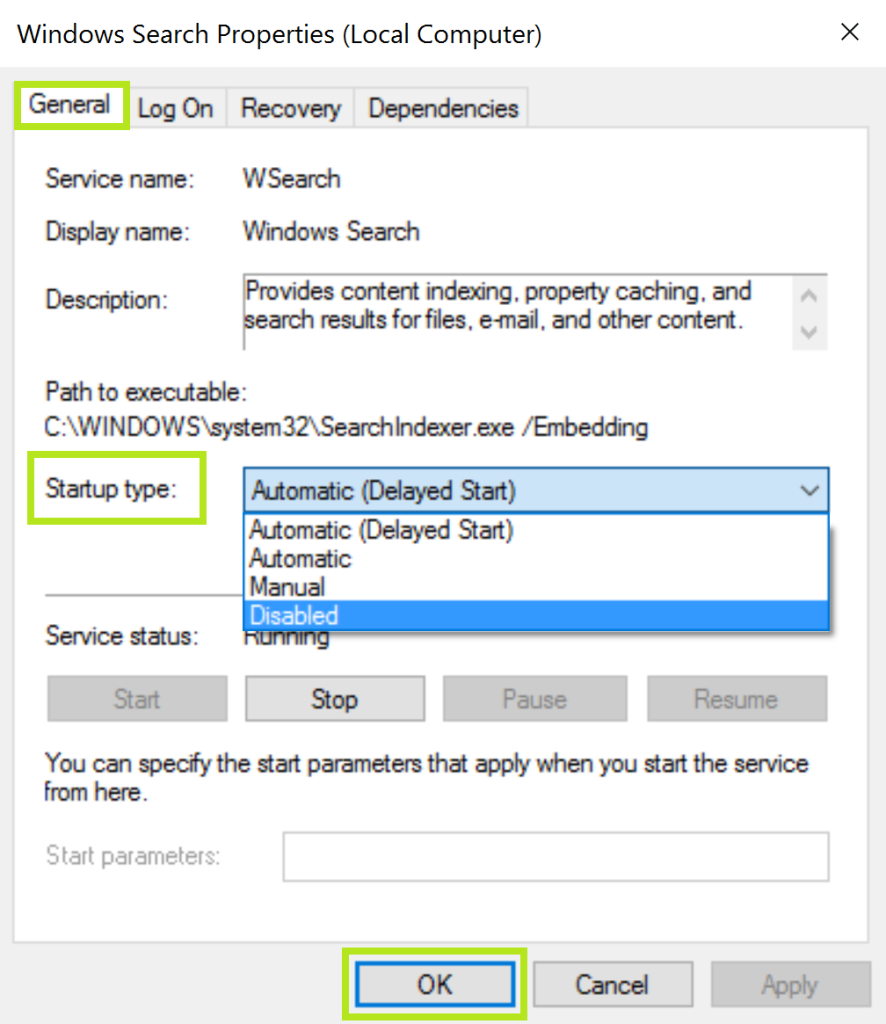
- From the services option, scroll down, and find the Windows Search option.
- When you find it, double-click on it.
- From the ‘Startup Type’ option, choose ‘Disable’. Then, click Apply, and Ok.
That’s it. Now, close the services option and you’ll see that the search index of Windows has been disabled.
Conclusion
So, guys, I hope you have found this guide helpful. If you liked this guide, you can share it on your social media platforms. Just use the share buttons below to share this guide. Above, we have described the method of disabling Windows search on your Windows PC or laptop. So, just follow the guide, and you can do that without any issues. If you have any questions or queries, you can ask them in the comment section below. You can also provide your feedback in the comment section.